Monitor the popularity of your reports
Google Data studio reporting is a massive hit right now, especially in the corporate sphere.
It’s free, easy to use, and enables the enormous potential for both holistic and granular levels of reporting, using hundreds of potential integrations.
While I recently talked about the limitations of Google Data Studio, now I’d like to talk about a cool, hidden gem of a feature it has — tracking.
That’s right, Google Data Studio reports allow embedding of a Google Analytics tracking-id, which will allow for more robust analytics data on how popular the beautiful reports you create are.
I will show you how to add this in just four steps.
1. Create a Google Analytics Property.
Assuming you have already created your Google Analytics account, you can create a Google Analytics property by navigating to the admin page of your account and hitting Create Property in the Property column.
You can then name the property — in this case, something along the lines of ‘Data Studio Reports’, as well as adjust the other property settings, such as:
- the property time zone
- whether you want it to be a universal property or not
- the website URL and protocol
- other information (e.g. information about the business)
Once the settings are adjusted, click on ‘Create’.
A detailed tutorial on how to complete this step is provided by Google in their analytics support documentation.
Once your property is created, you can move on to the next step.
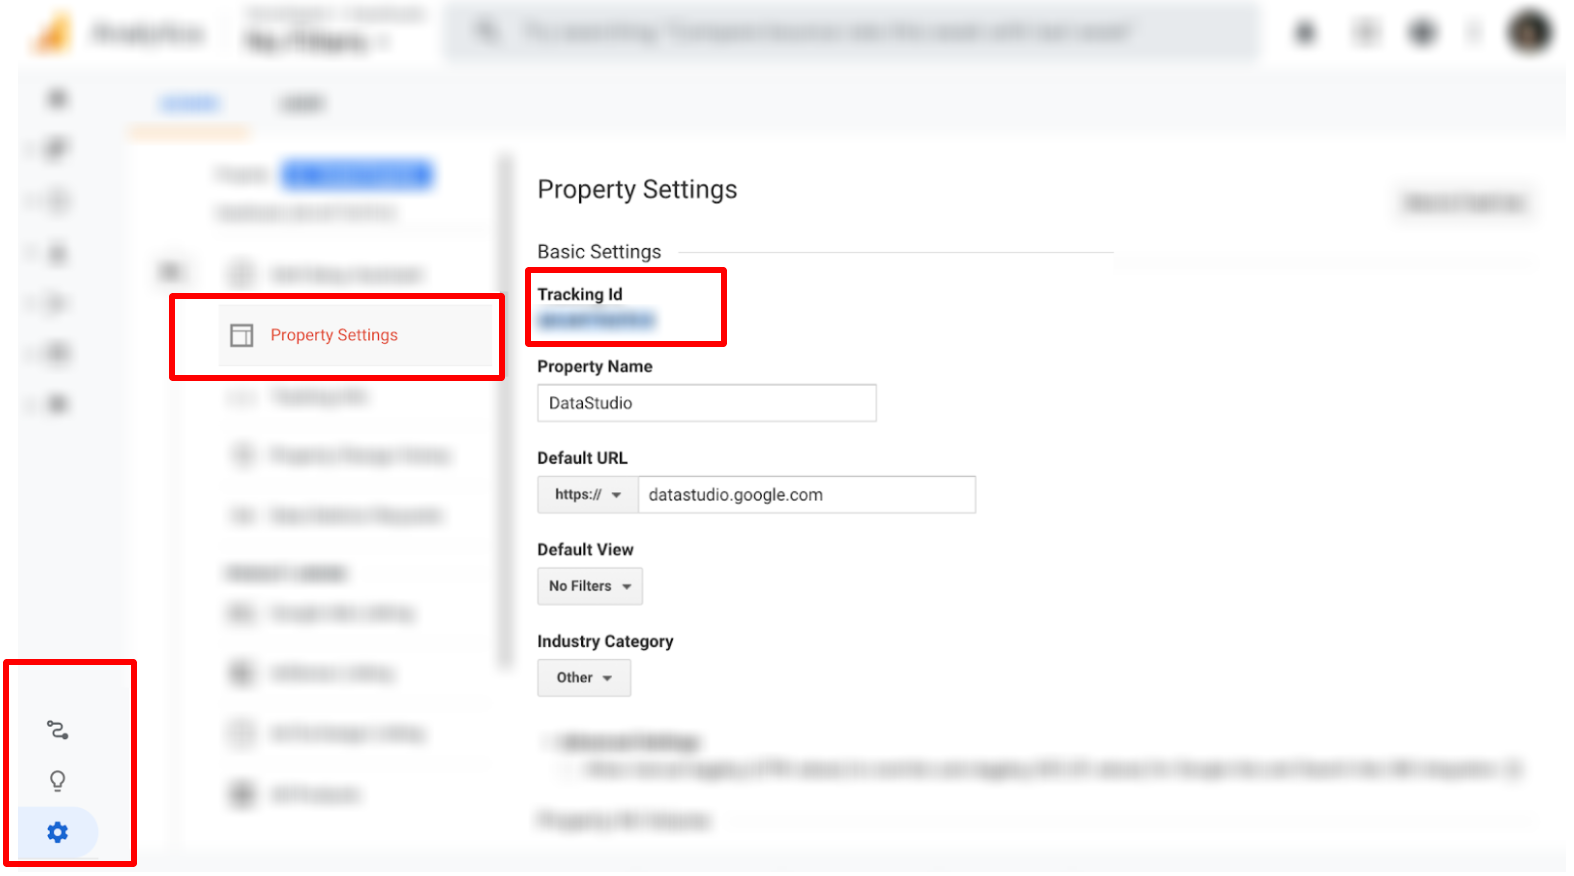
2. Copy the property’s tracking-id from the property settings.
Navigate to the Admin section (by clicking on the settings icon on the button left).
Then select the Property Settings tab.
The tracking-id is hosted in the first part of the settings (showing the rest of the page settings for context). Select and copy the tracking id.
Here is what Google says about this ID:
The tracking ID is a string like UA-000000–2. The first set of numbers (-000000, in the example above) refers to your account number, and the second set of numbers (-2) refers to the specific property number associated with the account.
The analytics only works when the tracking ID is also included in other instruments that support this type of tracking technology.
So, let’s head over to Data Studio and complete the integration.

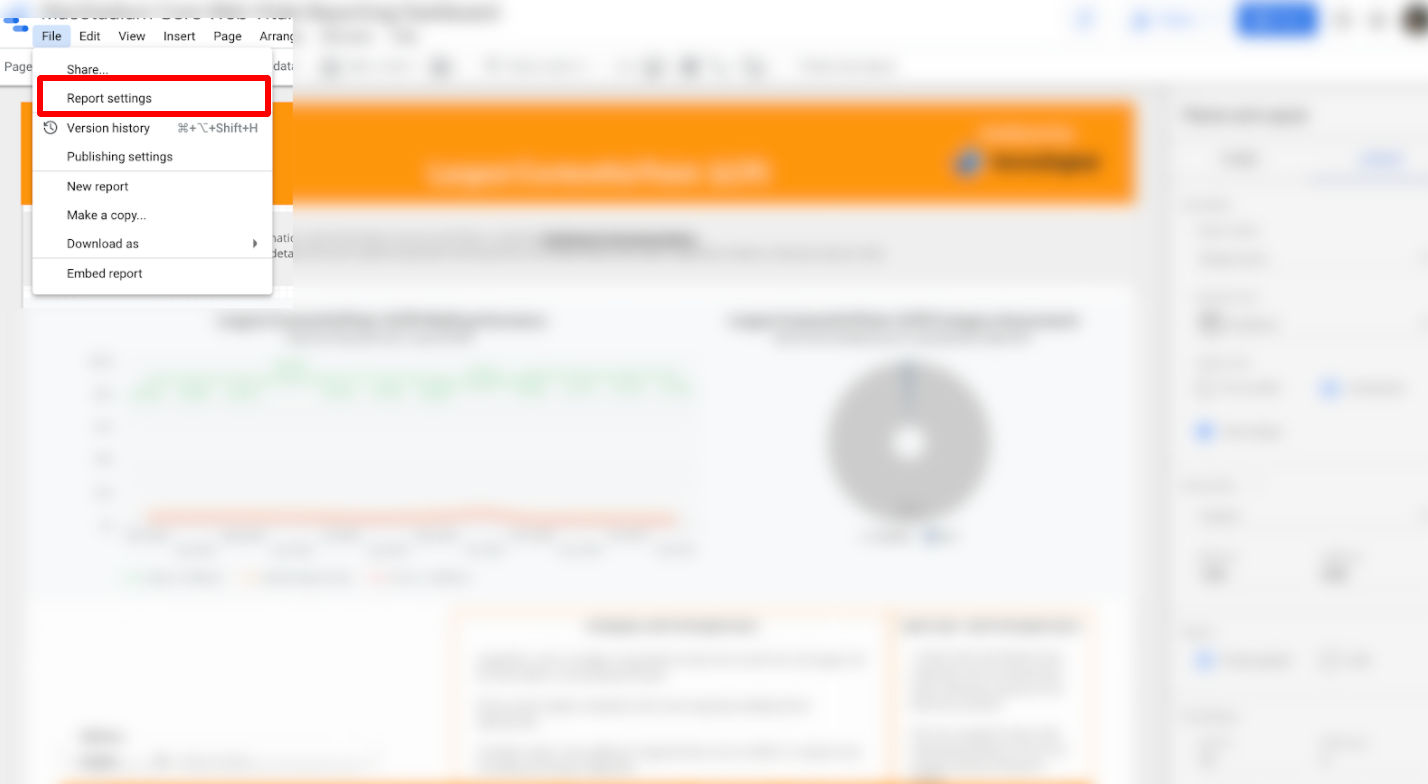
3. Open your Data Studio report and navigate to the report settings.
When in Data Studio, click on File, then Report Settings.

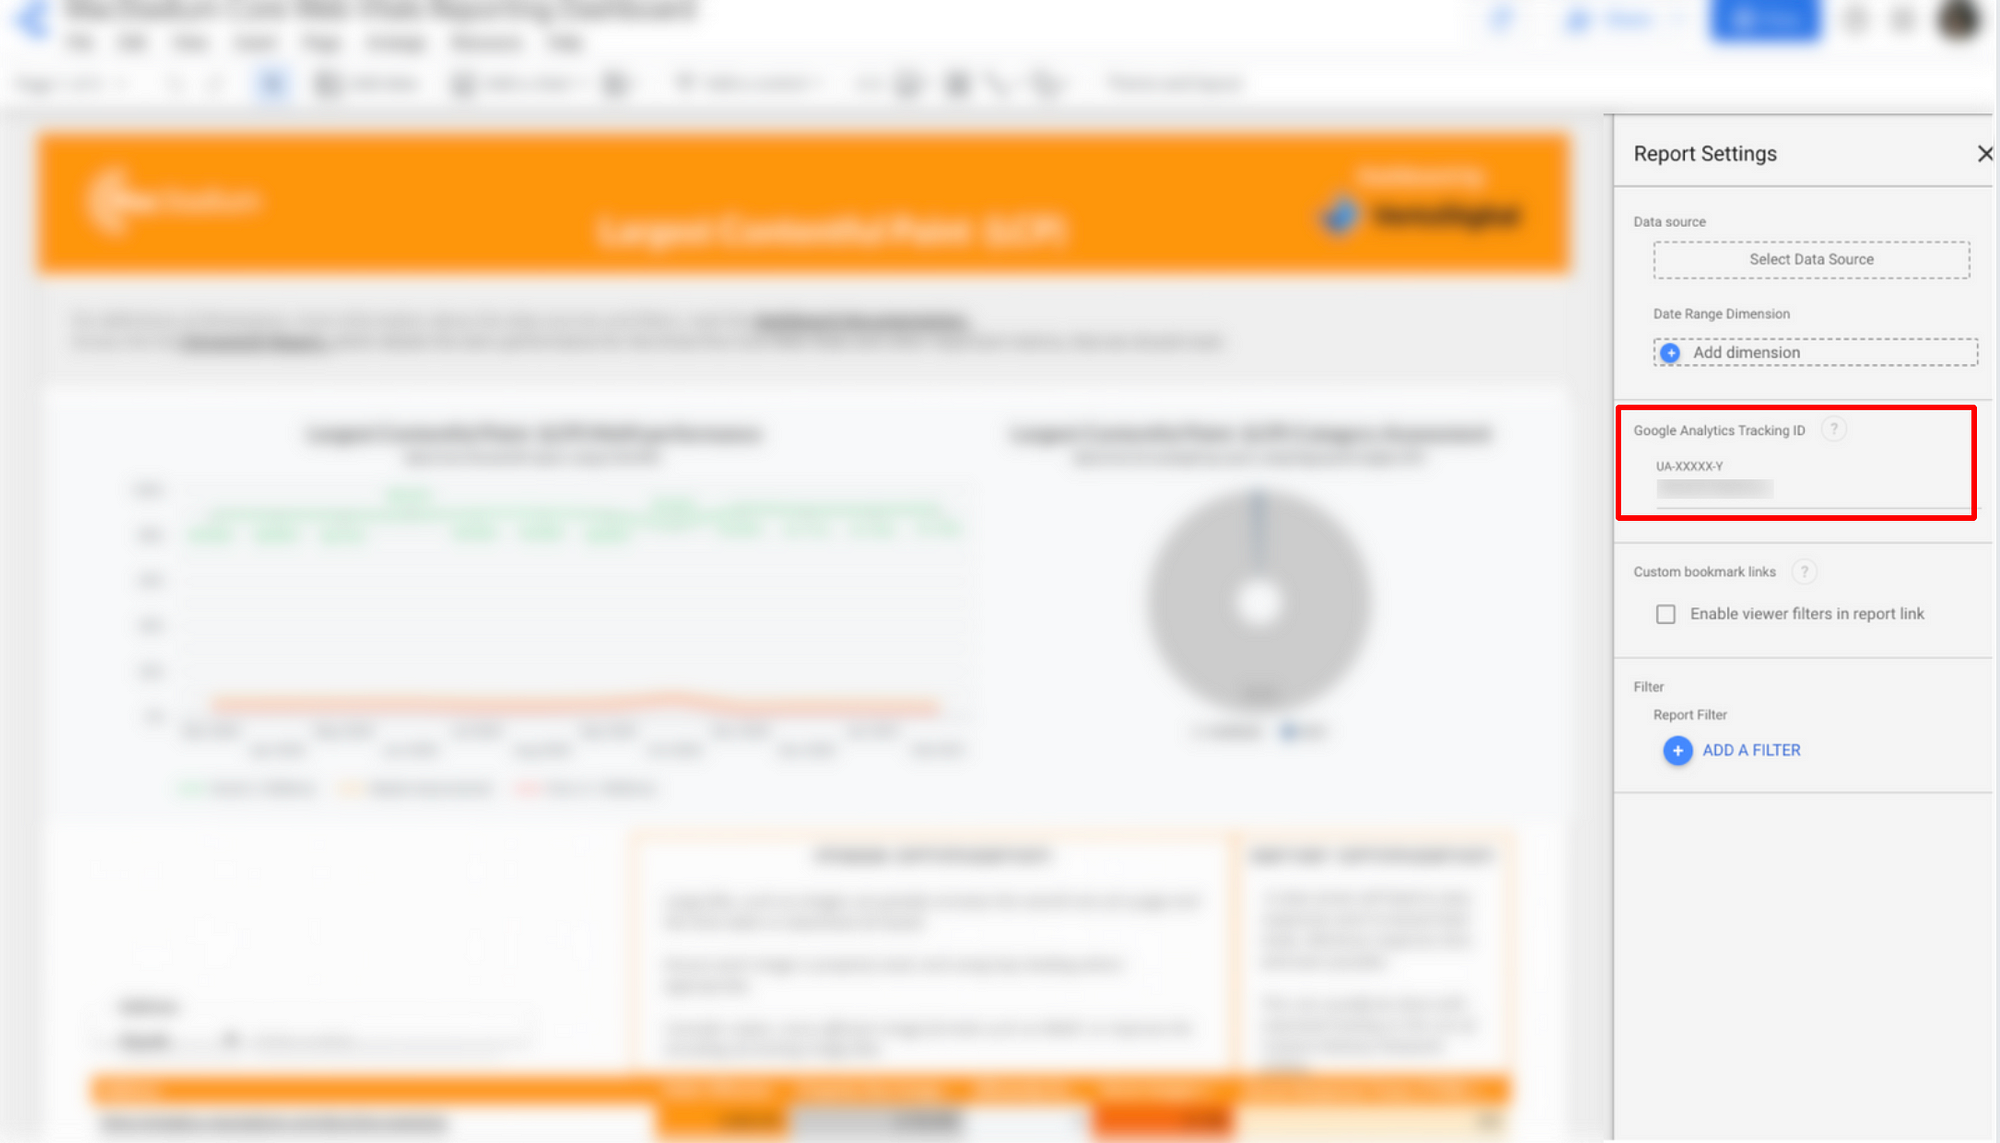
4. Insert the GA tracking-id
Insert the GA tracking-id code in the Google Data Studio Report.
This will enable you to get analytics data about the usage of reports, including user behavior data, user location, system and device used, etc.

Voila! Now you can monitor the performance of your reports.
When working with clients, always make sure their needs are addressed and their feedback is incorporated in the design of the report to ensure a higher likelihood of adoption across the organization.
Here is a recap of the process:
To set-up tracking for your Google Data Studio reports, create a property in GA and copy its tracking id from the Property Settings section. Then, navigate to any Google Data Studio’s report settings in the panel and insert the tracking id.


